Generally speaking, the Game Boy Color is a faster Game Boy with more memory that can display colors. That means that, believe it or not, every Game Boy game is a few routines away from being a full-fledged GBC game.
You may be wondering if this is as daunting a task as it seems. Well, depending on your knowledge of the system one could argue that it actually is not. However, doing it properly, loading every palette and attribute at the correct time and translating every effect takes an awful lot of work.
Pre-requisites
To get the most out of this post series, you'll need a basic understanding of Game Boy Assembly Language and a general familiarity with the Game Boy hardware.
Additionally, you need to know how to use a macro assembler that can patch binary files. I'll be using WLA-DX, but RGBDS should work similarly.
Some knowledge of basic programming concepts will also be presumed.
What is a colorization?
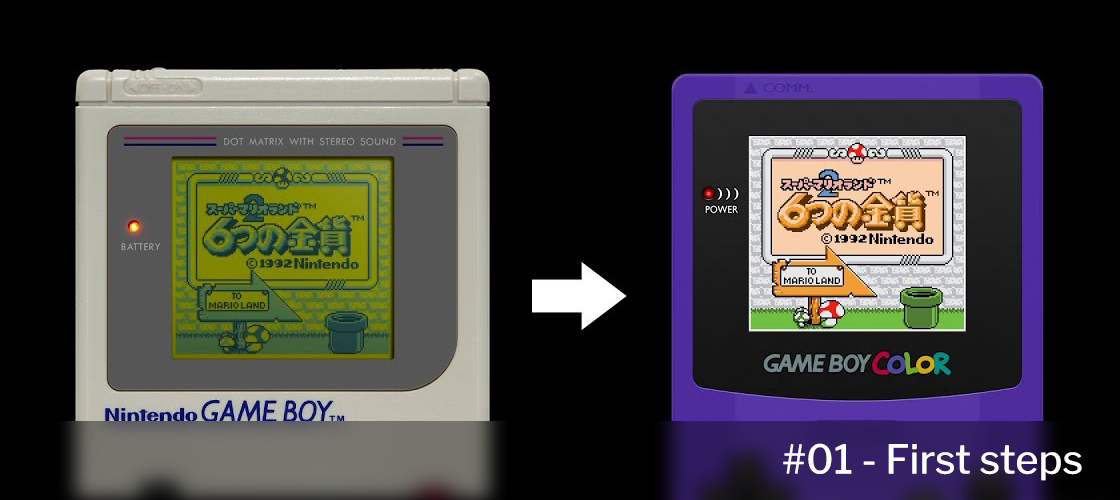
You probably already know what a colorization is in the context of Game Boy games: the process of converting them into Game Boy Color games and taking advantage of the GBC hardware.
But how is this actually done?
The general process can be broken down into the following steps:
- Change a few header values to let the hardware know this is a GBC game.
- Intercept the screen/level loading routine and load the appropriate palettes sets.
- Intercept the background printing routine and assign a palette to each tile.
- Modify the metasprite data (and often its routine) and assign a palette to each sprite.
- Change the maps so the background has the different tiles it needs (e.g., two gray tiles can now correspond to two different colors).
- (Optional) Add layers to the metasprites that need it.
- (Optional) Enable double speed mode if the CPU is overloaded or if the game has slowdowns.
- Fix anything that is broken: transitions (e.g. fade-in and fade-outs to black or white), fix whatever double-speed mode broke, fix drawing priority problems, etc.
Game Boy Color technical limitations
Another thing to keep in mind is the actual technical limits of the system.
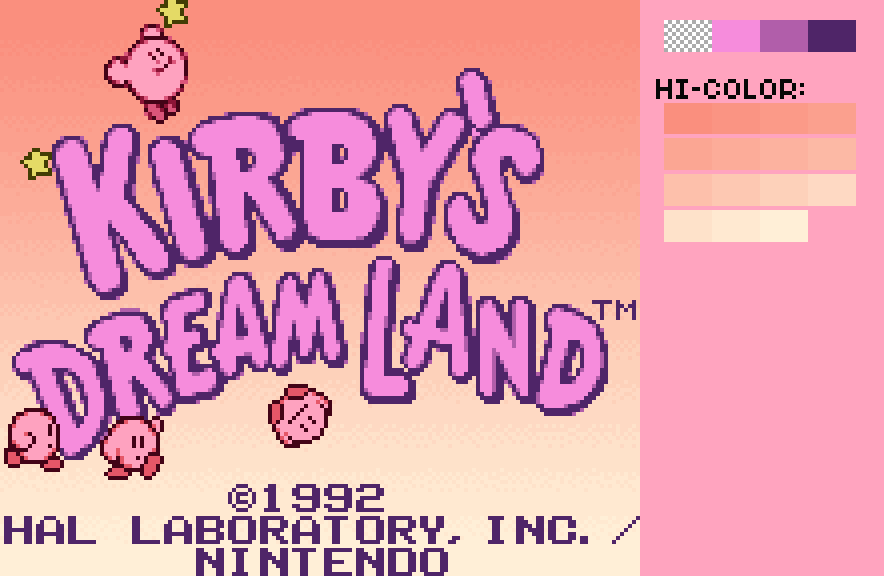
For backgrounds, there are eight four-color background palettes which you can choose from 32,768 colors (15-bit RGB or 5-bits per channel). Theoretically, that means you can have up to 32 colors per scanline, although in most scenarios you will have that many colors on the entire background (possibly excluding the HUD).

Of course, these colors can't just be anywhere. Each tile, or 8x8 pixel block, must be assigned one of the 4 colors palettes.
For sprites it's similar — they have their own set of palettes, but one of the colors is necessarily transparent. There is a technique to make metasprites show more colors on screen called layering, but you'll have to take into account the number limit of the sprites: 10 per scanline, 40 in total.
Mockups, goals and motivation
Working on a project for so many hours without a clear objective can be very painful when it comes to keeping motivation.
Once the experimentation phase is over, I think the best thing you can do is to make some mockups (with the technical limitations mentioned in the previous section in mind) to set yourself a goal.
Are you aiming for subtle color enhancements or do you want to push the hardware to its absolute limits? It's probably best to find this out before you start, as it will help you make informed decisions regarding color choices, level of detail, and overall aesthetic.

If you don't have artistic sensibilities, I still recommend you find someone to help you with it. Trust me, this step will greatly help in the long run.
Setting up the environment
Directly editing the ROM is not practical for medium to large sized romhacking projects, so having an environment that allows you to inject your code into a base ROM is a must.
Take a look at this example of a compilation script I've used in one of my projects:
$compilation = {
	$rev = (Get-Content $ROM -Encoding Byte -ReadCount 1)[332]
	$english = if ((Get-Content $ROM -Encoding Byte -ReadCount 1)[334] -eq 87) {0} else {1}
	$englishROM = if($english -eq 0){"output_en.gbc"}else{"output.gbc"}
	echo "ROM revision: v1.$rev - $(if($english -eq 0){"English"}else{"Japanese"})"

	if (Test-Path -Path $englishROM -PathType Leaf){
		rm $englishROM
	}
	echo "[objects]`r`noutput.o" | out-file -encoding ASCII temp.prj
	wla-gb -D REV=$rev -D ENG=$english -o output.o main.asm
	wlalink -s temp.prj $englishROM
	rm temp.prj

	if (Test-Path -Path $englishROM -PathType Leaf){
		echo "Success!"
	}else{
		echo "Something went wrong."
	}
}

$ROM = './baserom.gb'
&$compilation

$ROM = './baserom_en.gb'
&$compilation
I extract some values from the ROM header like the destination code or the version and use them as arguments for the assembler, but at the moment you don't have to worry about any of that.
That said, you will need a similar script to compile your changes. For now, all we really need is these two files:
wla-gb -o output.o main.asm
wlalink -s temp.prj output.gbc
[objects]
output.o
And of course, our entrypoint:
; ****************************************
; *** DEFINITIONS & ROM INITIALIZATION ***
; ****************************************

.MEMORYMAP
	DEFAULTSLOT 1
	SLOTSIZE $4000
	SLOT 0 $0000
	SLOT 1 $4000
.ENDME

.ROMBANKSIZE $4000
.ROMBANKS 16			; 16 banks
.ROMGBCONLY			; Writes $C0 ("GBC only") into $0143 (CGB flag)
.COMPUTEGBCOMPLEMENTCHECK	; Computes the ROM complement check ($014D)
.COMPUTEGBCHECKSUM		; Computes the ROM checksum ($014E-$014F)

.BACKGROUND "baserom.gb"	; This loads the ROM so we can write directly into it

.UNBACKGROUND $3DB0 $3FDF	; Free space in bank $00
.UNBACKGROUND $4DF0 $7FDF	; Free space in bank $01
.UNBACKGROUND $B910 $BFFF	; Free space in bank $02
.UNBACKGROUND $FED0 $FFDF	; Free space in bank $03
; ...
If you have reached this point, you should have a script that generates a ROM that boots in GBC mode. In following posts I'll explain how to load custom palettes and use them.
Check out the code so far in GitHub